
RAPTIR (Retroclavicular APproach to The Infraclavicular Region)
a potent single-injection upper extremity block that provides extensive, reliable arm anesthesia
- An infraclavicular brachial plexus block with improved needle visualization versus the traditional infraclavicular technique.
- In the clip below, the needle has been passed behind the clavicle and is positioned just deep to the axillary artery. Injection of local anesthetic easily distends the fascial compartment (axillary sheath) and anesthetizes the posterior, lateral, and medial cords of the brachial plexus.
(## What we love about the RAPTIR:
- extensive, reliable upper extremity anesthesia
- safety - decreased risk of phrenic nerve paralysis, excellent needle visualization when near axillary artery at injection target
- easily identified sonographic landmarks
- not dependent on pt holding neck very still during needling such as with blocks in the neck (e.g. interscalene)
- rapid performance - needling time typically less than 5 minutes
- minimal patient discomfort during needling
- comfortable patient positioning
RAPTIR is GREAT for:
- arm fractures & dislocations (DISTAL RADIUS FRACTURE, HUMERUS FRACTURE, SHOULDER DISLOCATION, ELBOW DISLOCATION) (follow these guidelines)
- extensive upper extremity soft tissue injuries (e.g. large/complex wounds requiring debridement, exploration, repair)
- large arm abscesses (e.g. deltoid or forearm abscesses in setting of IDU)
- pain control (e.g. fireworks/blast injuries, traumatic amputations, etc.)
RAPTIR is NOT great for:
- pt’s with a deformed clavicle (such as from a prior or acute clavicle fracture), thick pectoral region, “full” supraclavicular fossa, or short neck
NB:
Since the ultrasound beam cannot penetrate the clavicle, the RAPTIR block needle initially passes through an approximately 3cm “blind zone” before emerging from the clavicle’s acoustic shadow and becoming visible on ultrasound in the infraclavicular space. This presents the novel experience of passing a needle behind a bone while performing a regional block. To safely transverse this “blind zone,” the transducer is positioned lateral to the thoracic cage and aimed towards the axilla (as described in the sections below), then the advancing needle is simply aligned with the long axis of the ultrasound beam. By staying close to the underside of the clavicle and advancing at an angle parallel to the surface of the gurney bed, the block needle passes safely through muscle and loose connective tissue.
How it's done:
Positioning
Place the patient in a semi-recumbent supine position with the affected extremity adducted at their side in a position of comfort. Place one folded blanket under the ipsilateral upper back and another folded blanket under the patients head. Position the blankets so that they do not extend into the area above the shoulder where the operators hand will be manipulating the block needle. Rotate the patients head away from the injured limb. Stand at the head of the bed with the ultrasound system in direct line-of-sight on the side of injury.
Scanning
Place a high-frequency linear transducer in parasagittal orientation over the medial portion of the clavicle with the transducer marker facing cephalad (Figure 1A).
Slide the transducer laterally along the clavicle to the deltopectoral groove, then rotate the transducer slightly so that it aims towards the axilla (Figure 1B).
While sliding laterally, sonographically visualize the axillary artery in cross section as it emerges from under the clavicle (Figure 1C), traverses the 2nd rib, then courses away from the thoracic cage (Figure 1D).
The extrathoracic portion of the axillary artery will be apparent on ultrasound when the 2nd rib drops out of view. At this location, identify the injection target which lies just posterior to the axillary artery.
Figure 1. Ultrasound technique for finding the injection target
A. Position A: With the transducer marker cephalad, the transducer is placed on the medial clavicle in the parasagittal orientation with the clavicle and infraclavicular region in view.
B. Position B: Maintaining the same orientation and keeping the clavicle at the cephalad edge of the view, the transducer is moved laterally to the deltopectoral groove, placing the transducer lateral to the thoracic cage and medial to the coracoid process. While moving the transducer, the axillary artery is sonographically observed emerging from beneath the clavicle, traversing the 2nd rib, then coursing away from the thoracic cage. When the second 2nd rib drops out of view the injection target is identified. The transducer is then rotated slightly so that the caudad portion aims towards the axilla.
C. Ultrasound image at Position A. Axillary artery visible emerging from under the clavicle. The 2nd rib is also visible.
D. Ultrasound image at Position B. Axillary artery and clavicle still in view, but the 2nd rib is no longer visible as the transducer has moved lateral to the thoracic cage. The injection target posterior to the axillary artery is now in view. Keeping the target in view, rotate the transducer slightly so that it aims at the axilla.
With experience an alternative position can be used between position A and position B, in a location where the axillary artery has emerged far enough from the clavicle to have a sufficient view of the approaching needle, but where the 2nd rib is still in view and used to shield the pleura from the needle. This can be helpful in patients with a “full” supraclavicular fossa, but is not advised for novice practitioners.
Dotted line = clavicle, C= acoustic shadow of the clavicle, PecMa = pectoralis major, PecMi = pectoralis minor, AxA = axillary artery, AxV = axillary vein, R2 = 2nd rib, CV = cephalic vein, green dot = injection target location. (AxV and CV may not be visible on ultrasound due to compression from transducer pressure on the chest wall)
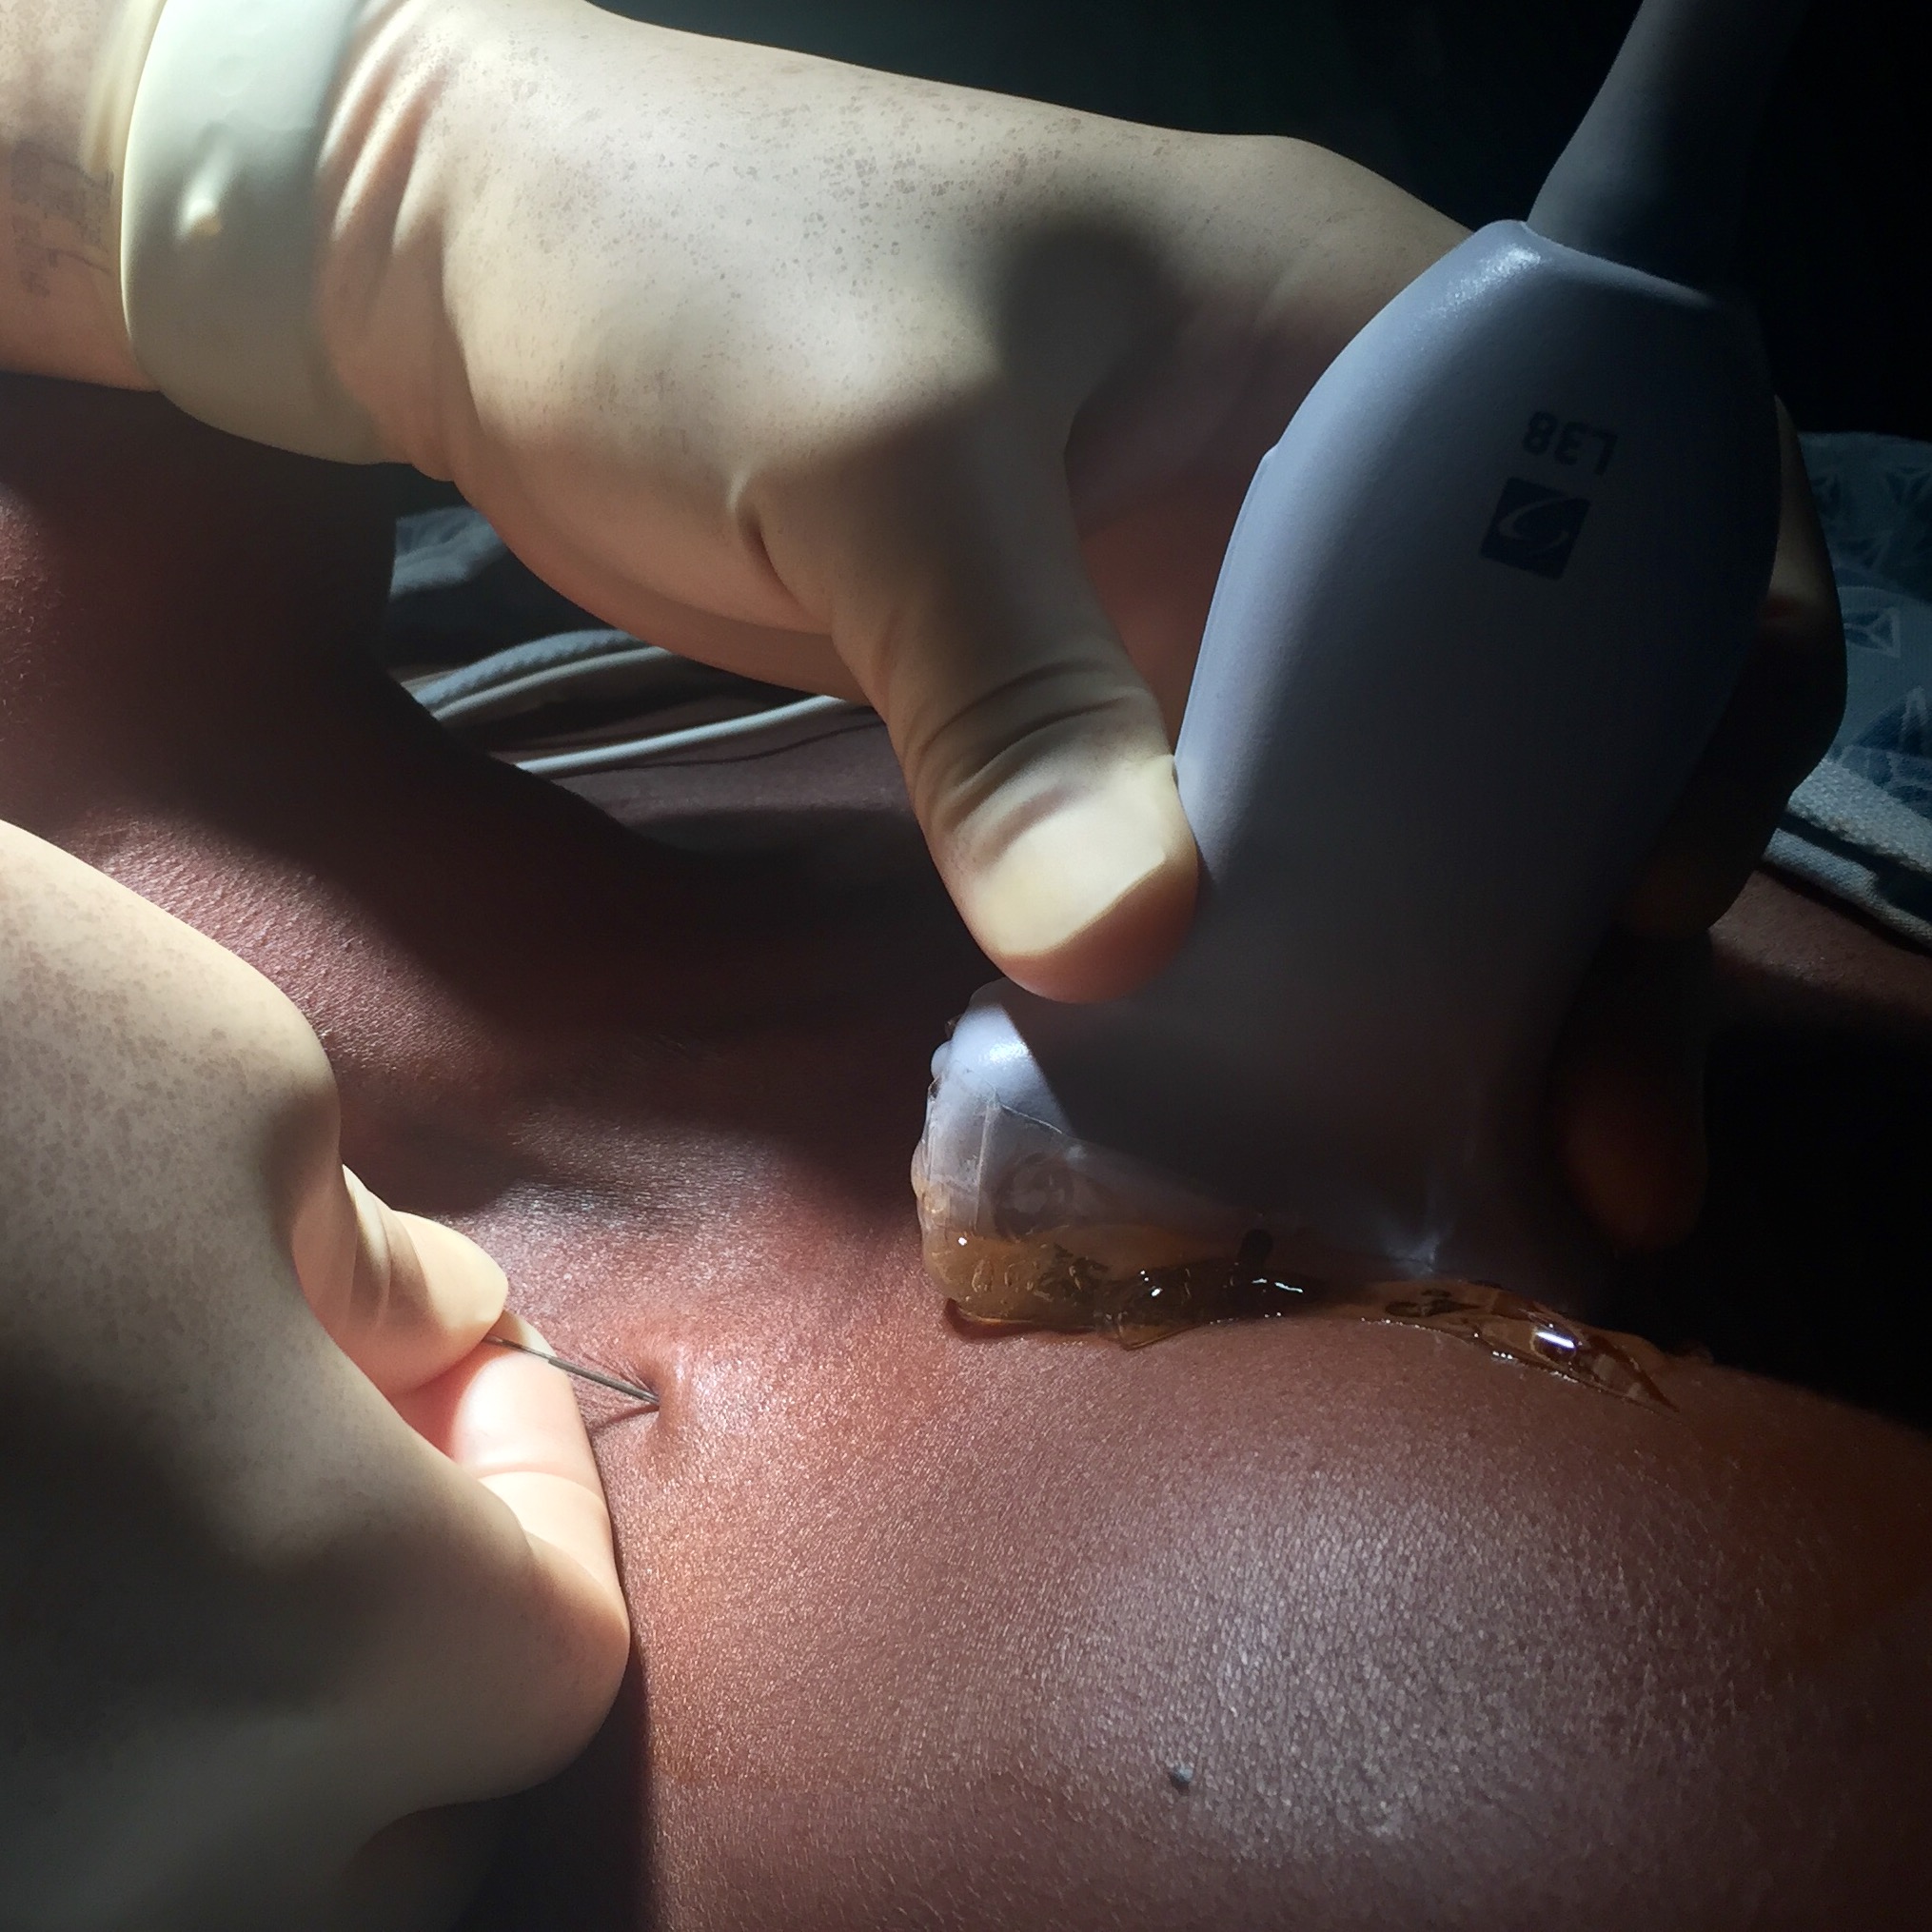
Injection
Keeping the transducer fixed over the injection target and aimed at the axilla, identify a block needle insertion site aligned with the long axis of the ultrasound beam and approximately 2 cm cephalad to the clavicle (Figure 2). This will ensure a safe needle path and allow adequate room for the needle to clear the posterior surface of the clavicle without angling posteriorly. Place a LA skin wheal at the insertion site using a 25-27g needle, then insert a block needle (e.g. Tuohy 20g 90mm epidural needle) through the skin wheal and advance the needle beneath the clavicle towards the ultrasound beam at angle parallel to the gurney bed. When passing through the “blind zone” created by the clavicle, the needle should never be angled posteriorly as this increases the risk of pneumothorax. After insertion through the approximately 3cm “blind zone" stop further needle advance and make slight transducer and needle adjustments until the needle tip is seen emerging from beneath the clavicle (Figure 3A). Continue advancing with in-plane ultrasound guidance toward the target location just posterior to the axillary artery. Here, the operator may feel a slight “fascial click” theorized to correspond with penetration of a fascial septum within the axillary sheath. Aspirate to check for inadvertent vascular puncture, and then inject small aliquots of LA. Anechoic anesthetic fluid should be seen spreading just posterior to the axillary artery, confirming needle tip location within the sheath (Figure 3B). Once satisfied with the needle position, gradually inject LA until a total of 35-40 mLs is deposited within the sheath (e.g. for 70kg pt: 35-40 mLs of 2% chloroprocaine, 1% lidocaine with epineperine, or 0.5% ropivacaine. Always adhere to weight-based LA dosing guidelines). In our experience, total needling time is usually less than 5 minutes and dense arm anesthesia develops within 30 minutes.
Figure 2. Needle, transducer, and axilla alignment; angle of approach; and area of anesthesia
The transducer is in the deltopectoral groove with the injection target in view on ultrasound and rotated slightly to aim at the axilla. The needle insertion point is approximately 2cm cephalad to the clavicle and aligned with the ultrasound beam. The angle of approach is parallel with both the gurney bed and the transducer surface.
Dotted line = clavicle, asterisk = insertion point, purple shading = area of anesthesia.
Figure 3. Ultrasound guidance of block needle
A. After traversing the approximately 3cm “blind zone” further needle advance is stopped and slight transducer and needle adjustments are made until the needle tip is visible emerging from the clavicle’s acoustic shadow.
B. The block needle is then advance with in-plan ultrasound guidance to the target location just posterior to the axillary artery. Fine adjustments in needle position are made until small test injections of normal saline or local anesthetic (LA) are seen spreading within the axillary sheath just posterior to the axillary artery. The axillary artery often appears to float away (anteriorly towards the transducer) from the needle tip with injection, and anechoic anesthetic fluid collects just posterior to the artery (forming the “double bubble sign", with the first “bubble” being the axillary artery and the second “bubble” being the injected fluid) as additional confirmation of injectate deposition within the axillary sheath. Once satisfied with the needle position, LA is gradually injected in small aliquots following negative aspiration, until a total of 35-40 mLs is deposited within the sheath.
White dotted line = clavicle, C= acoustic shadow of the clavicle, PecMa = pectoralis major, PecMi = pectoralis minor, Ax = axillary artery, asterisk = needle tip, triangles = needle shaft, green dot = injection target location, blue dashed line = LA
LUFTIG/MANTUANI/HERRING/NAGDEV 2017
Last update March 2018
Additional resources
*For more RAPTIR resources -click here-
Positioning
Patient, operator and ultrasound system positioning. Note needle visible on screen from across the room. Plus AWESOME SOCKS
More images
relationship of transducer and needle insertion point to clavicle and 2nd rib (dashed lines), brachial plexus (yellow), axillary artery (red)
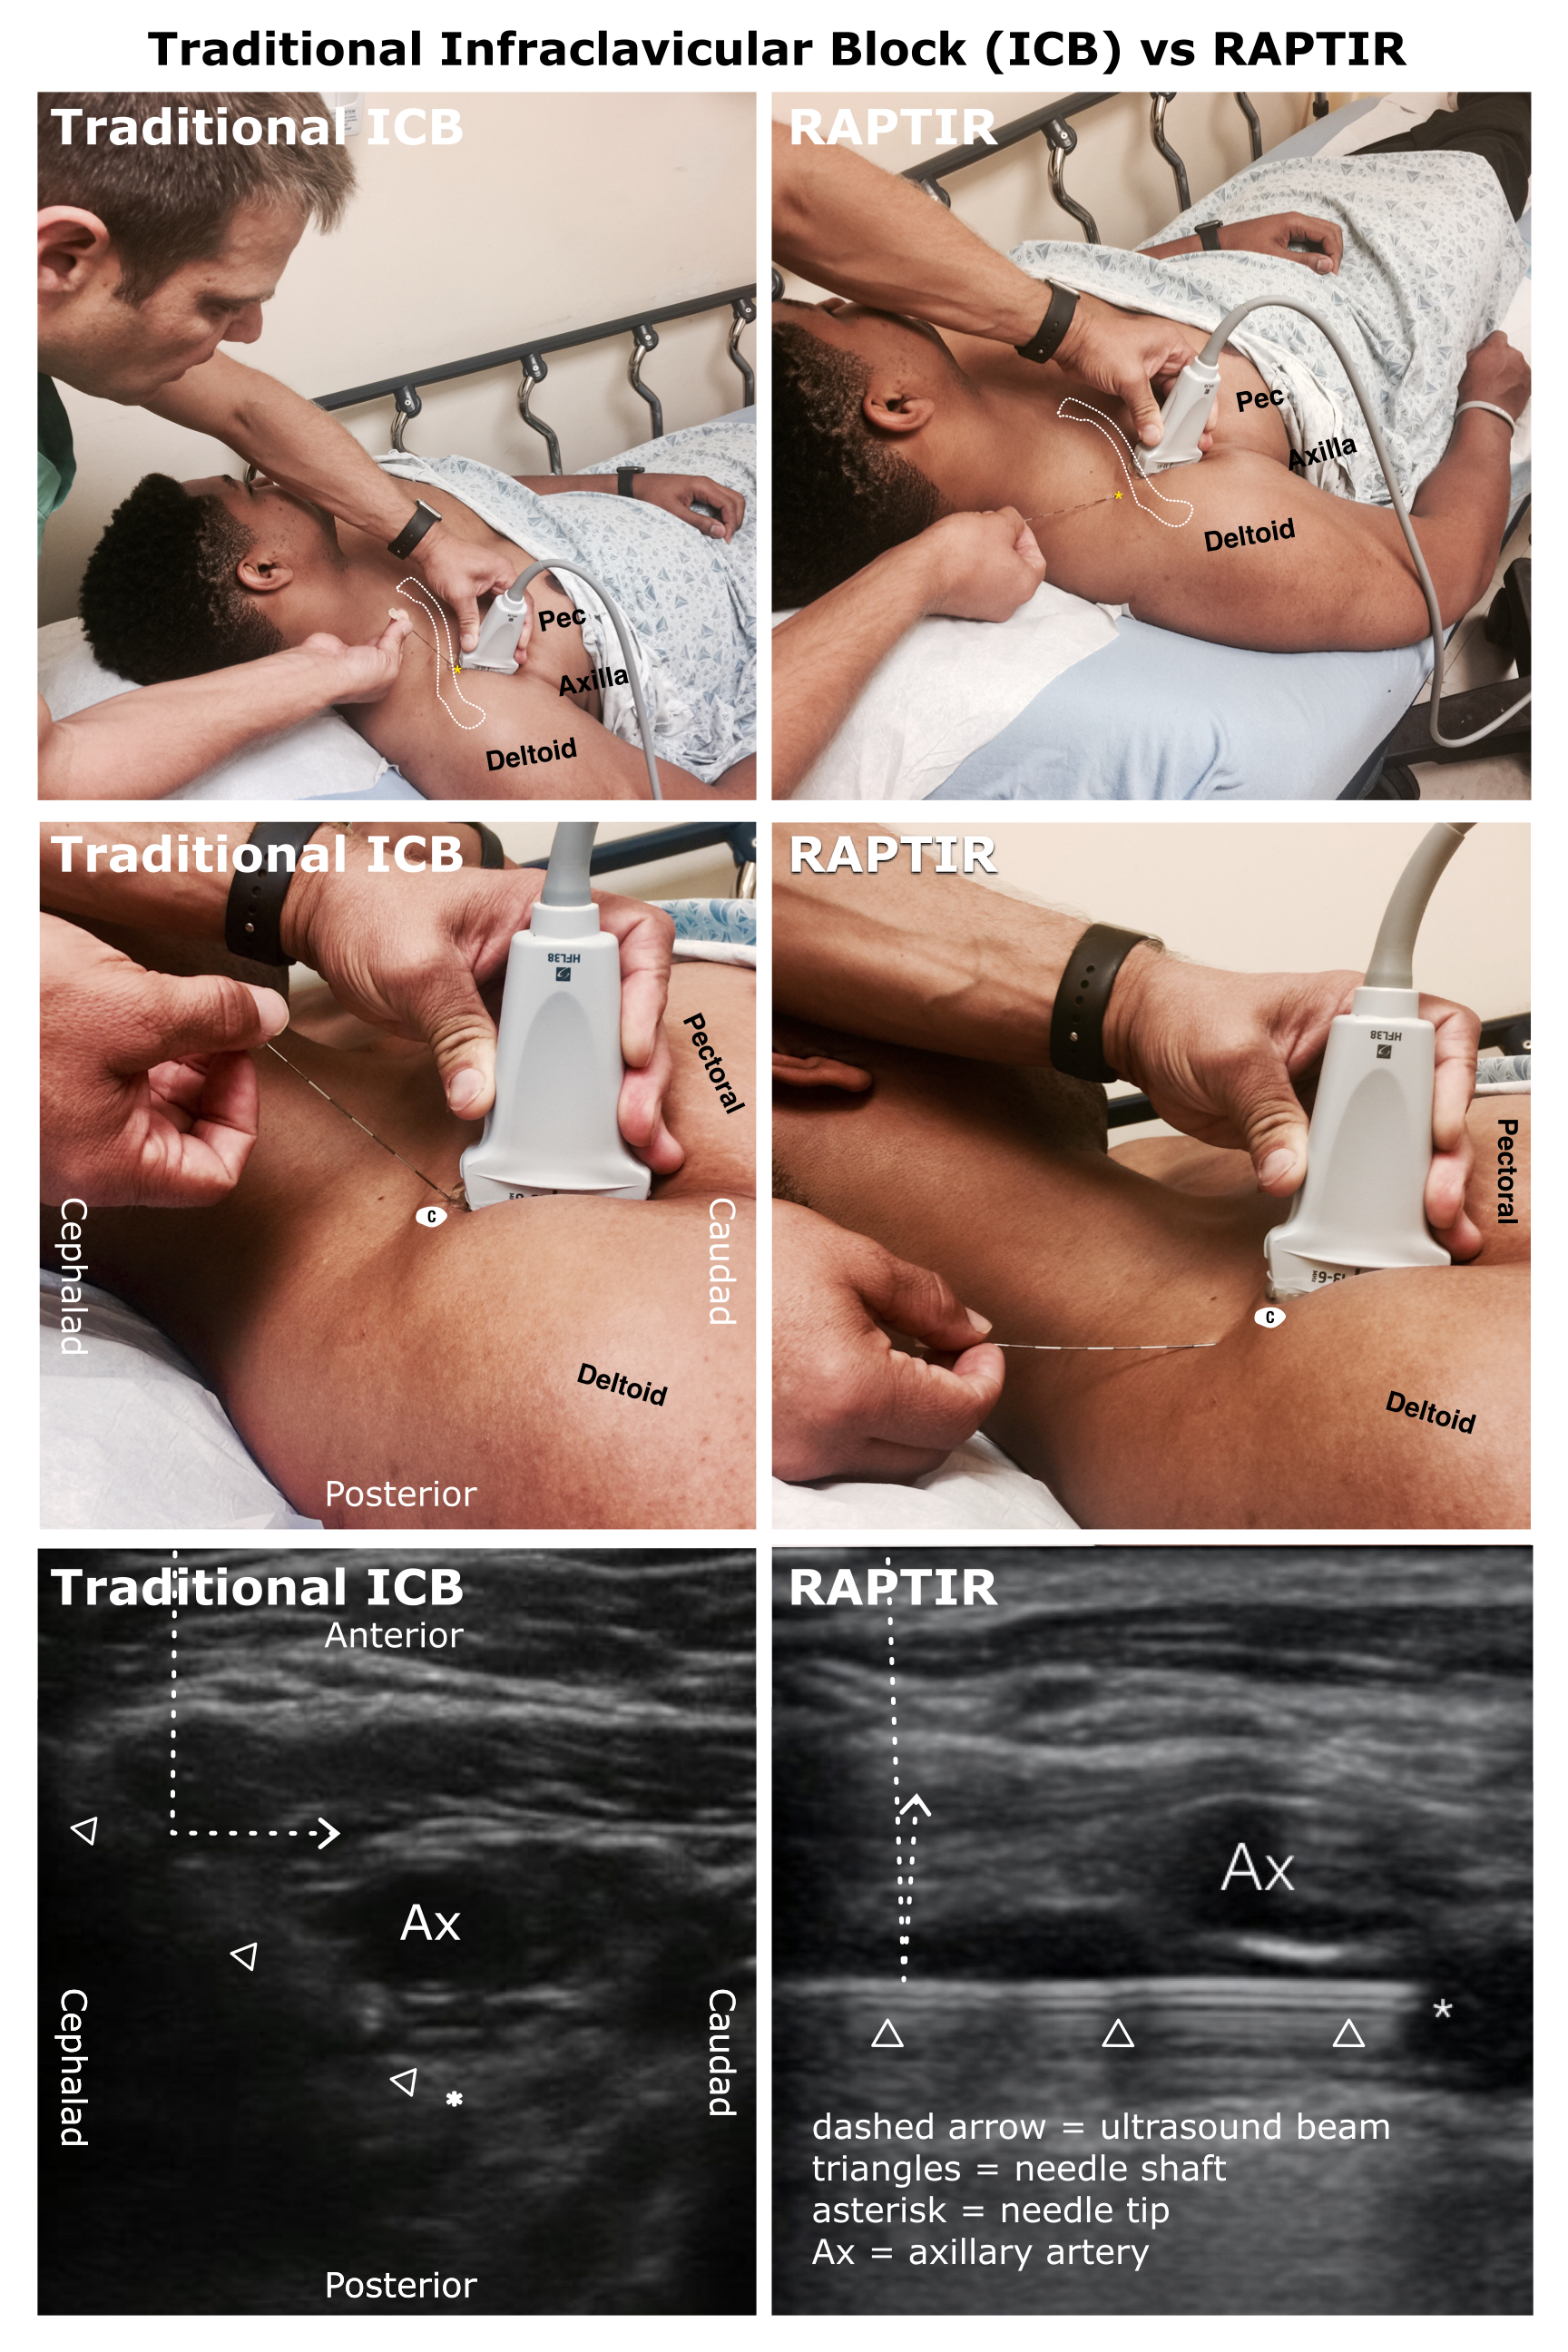
Needle visibility in the traditional approach ICB (TICB) vs the RAPTIR
Most tissues in the human body have irregular surfaces and act as radiating reflectors reflecting ultrasound beams in many directions. In contrast, needles have machined smooth and straight surfaces that act as specular (mirror-like) reflectors reflecting nearly the entire ultrasound beam at an angle directly opposite its angle of incidence upon the needle.
Top & middle left: Needle and transducer positions for the Traditional ICB.
Top & middle right: Needle and transducer positions for the RAPTIR.
Bottom left: Ultrasound view of the needle in the TICB. At this needle trajectory, the ultrasound beam is reflected off the mirror-like surface of the needle away from the transducer making the needle shaft and tip nearly invisible. (C = cross section of clavicle at insertion point)
Bottom right: A similar ultrasound view of the needle in the RAPTIR. The needle trajectory is now parallel to the transducer and the beam reflects straight back to the transducer resulting in an intensely hyperechoic needle shaft and tip.
A Tuohy 20g 90mm epidural needle is used as the block needle in both images.
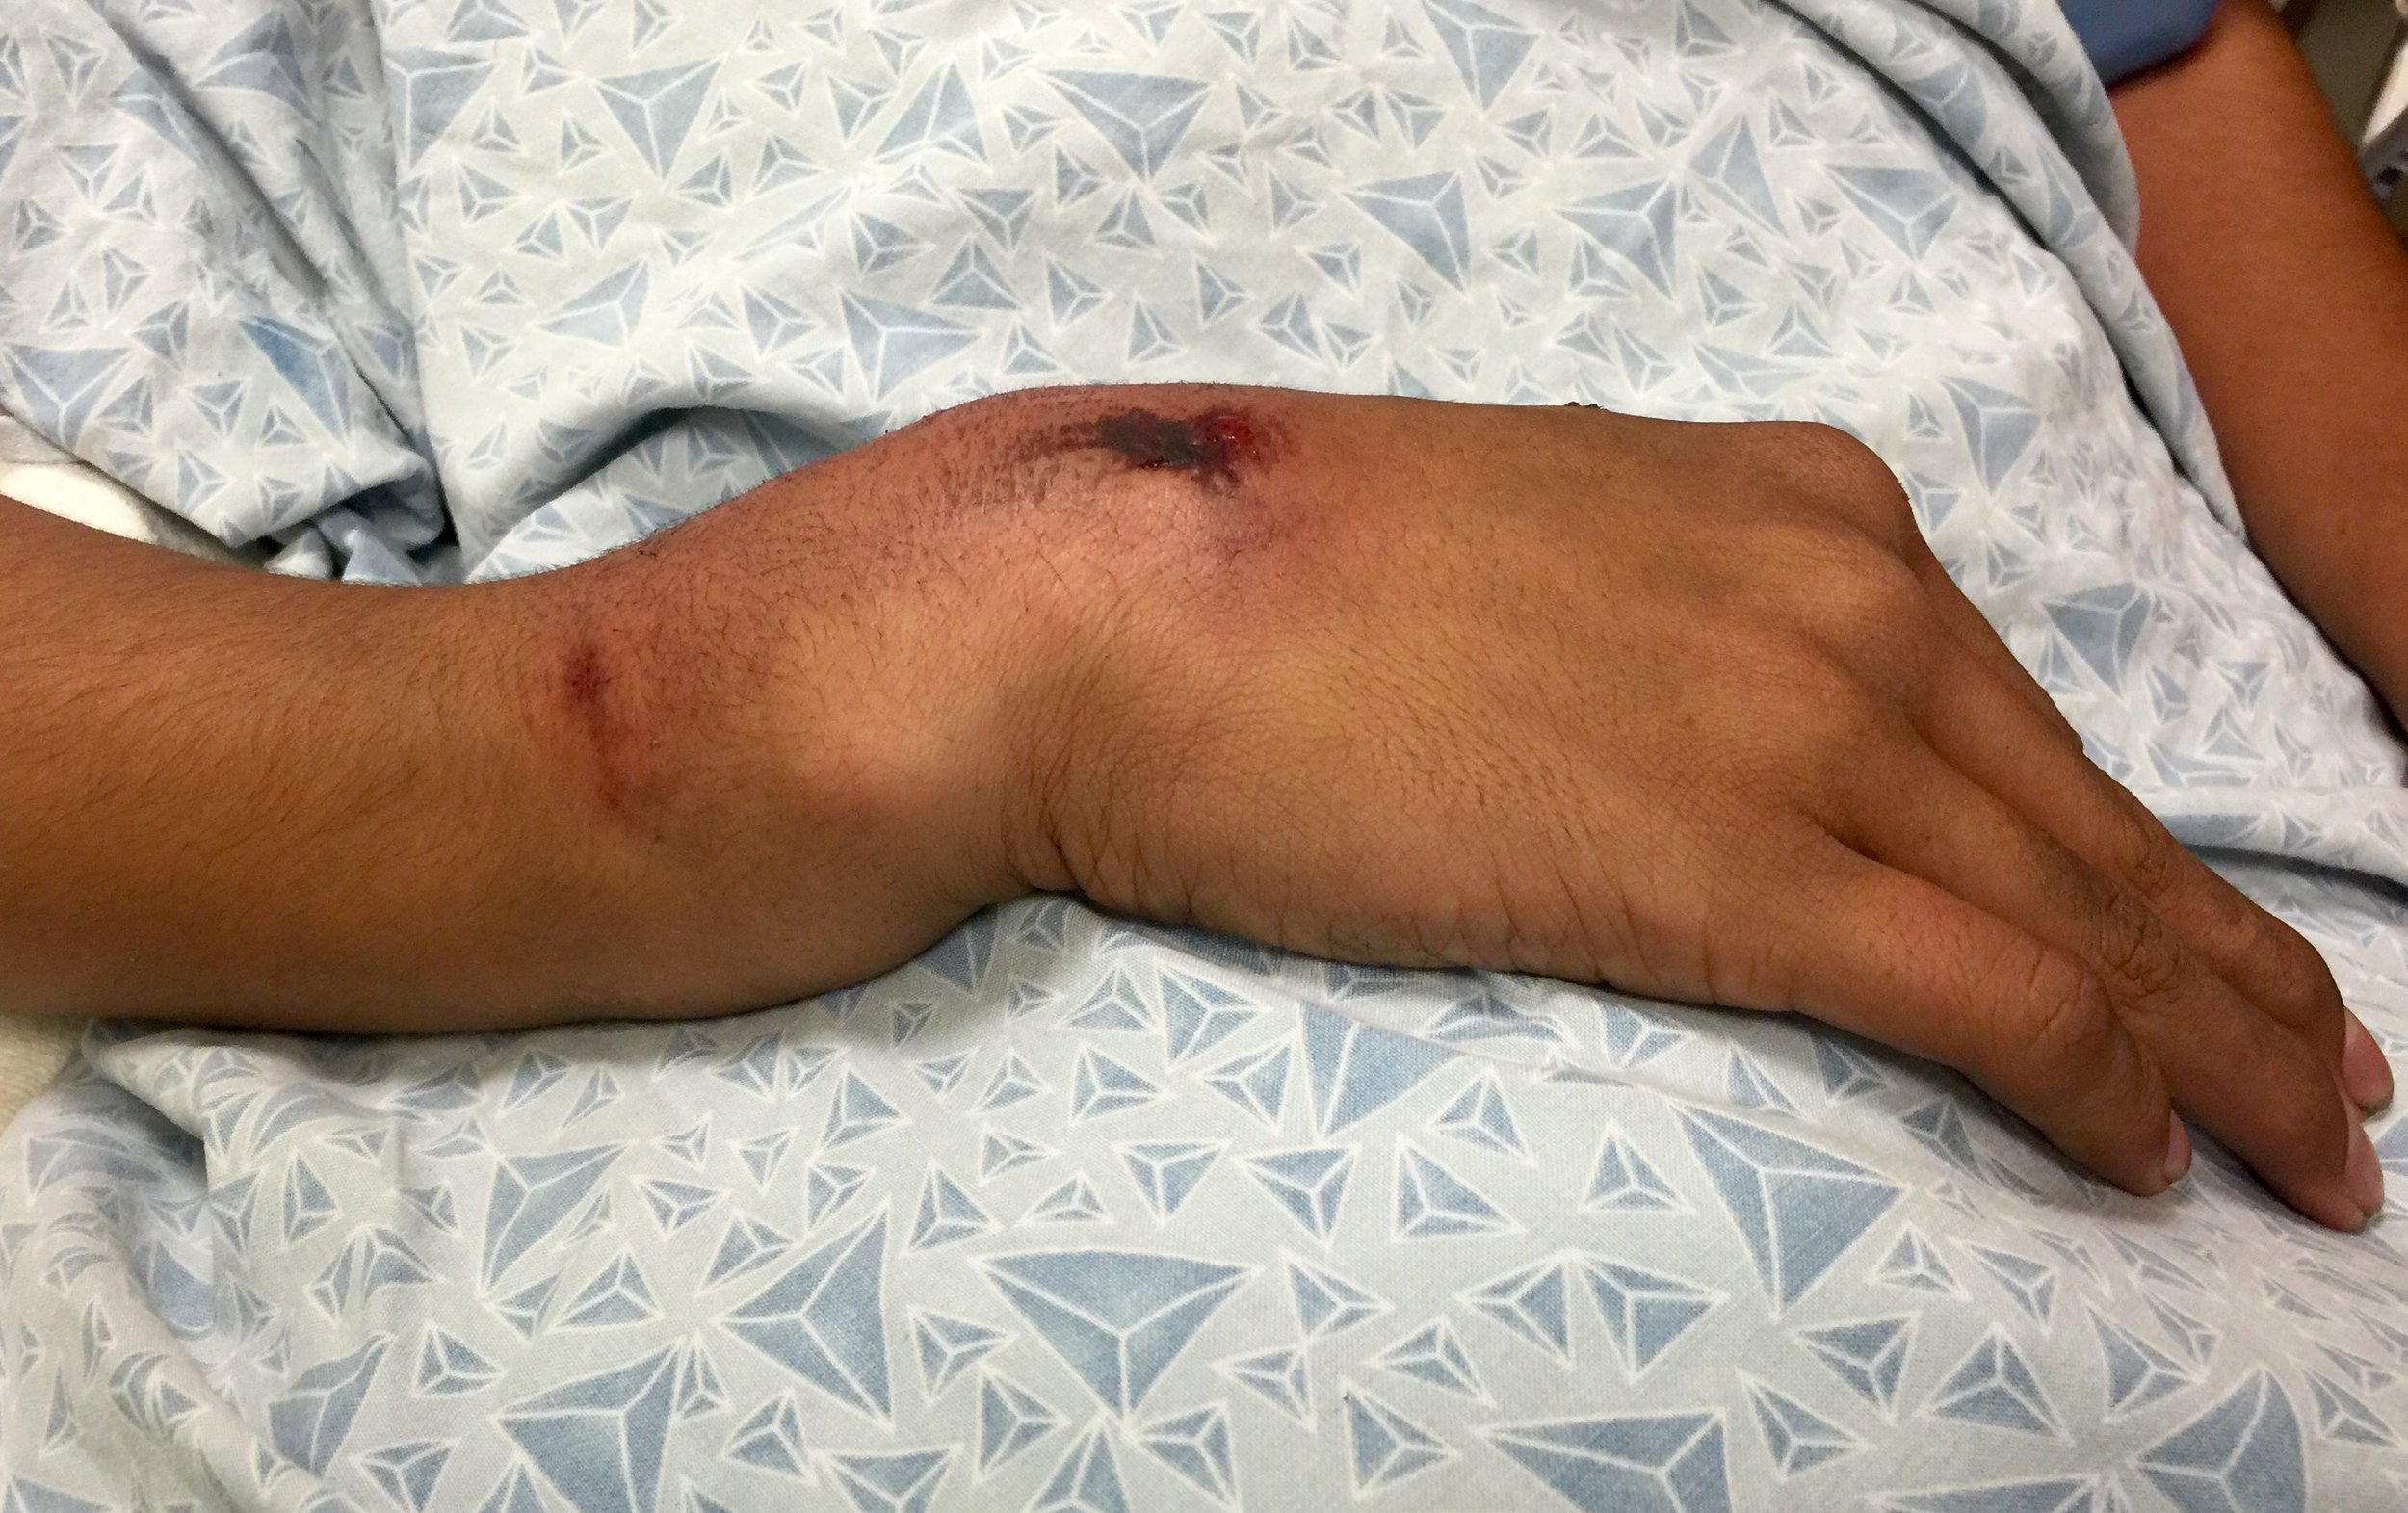
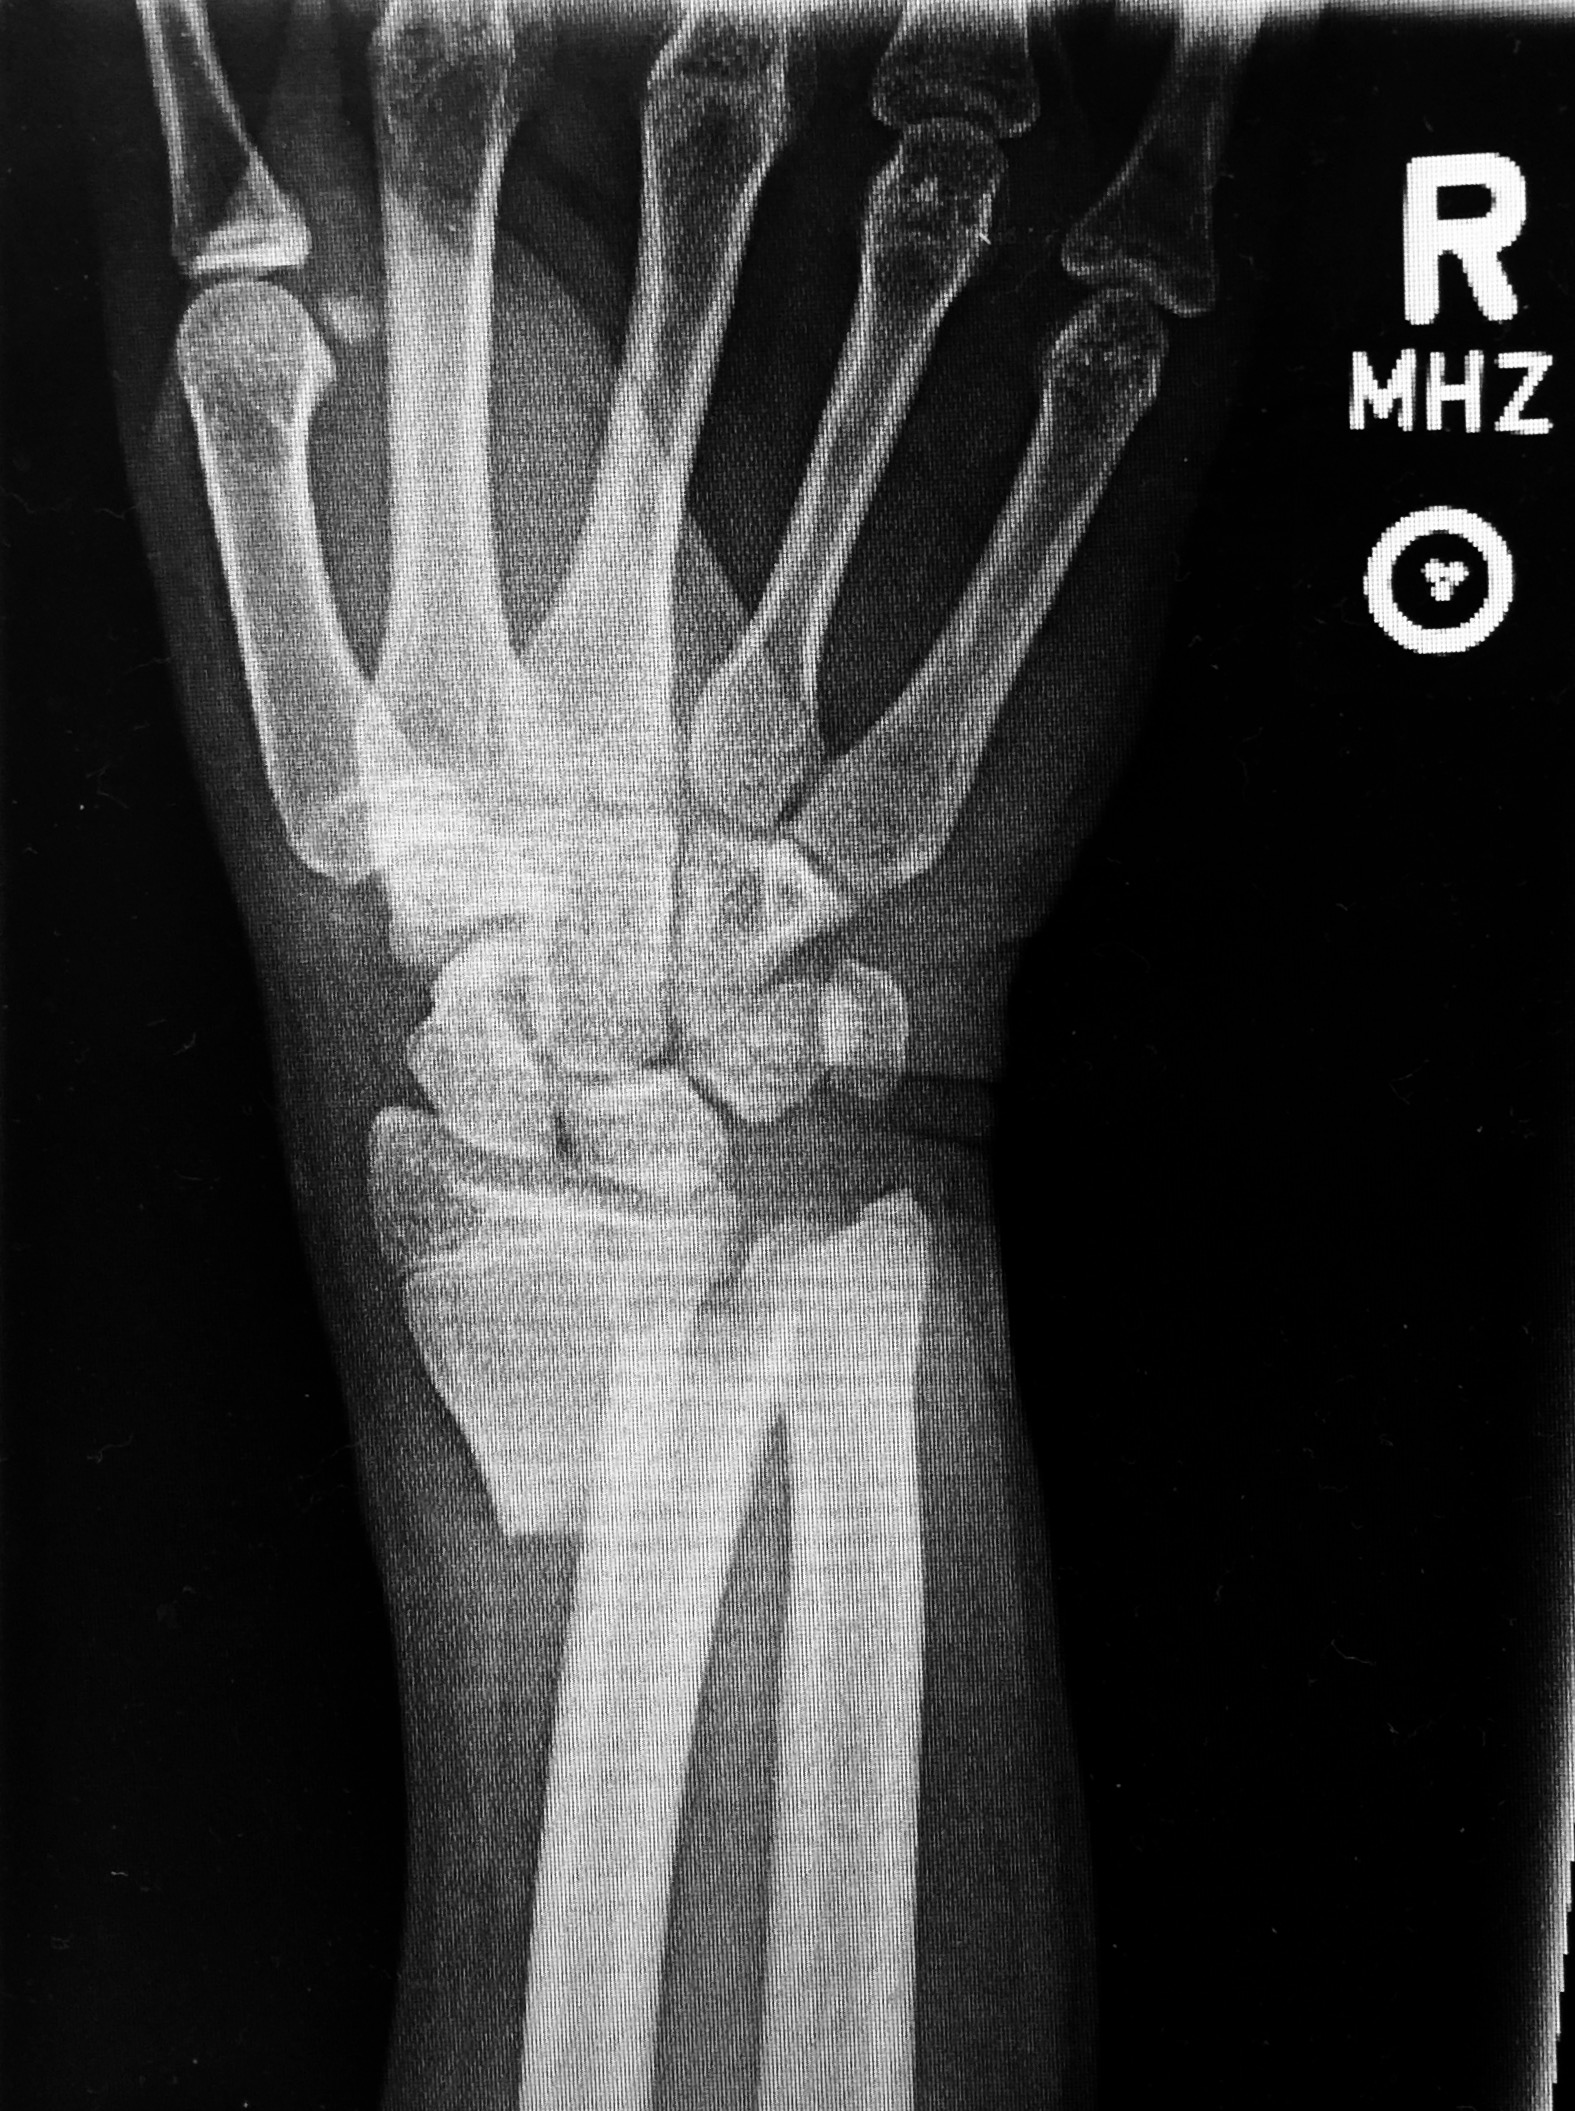
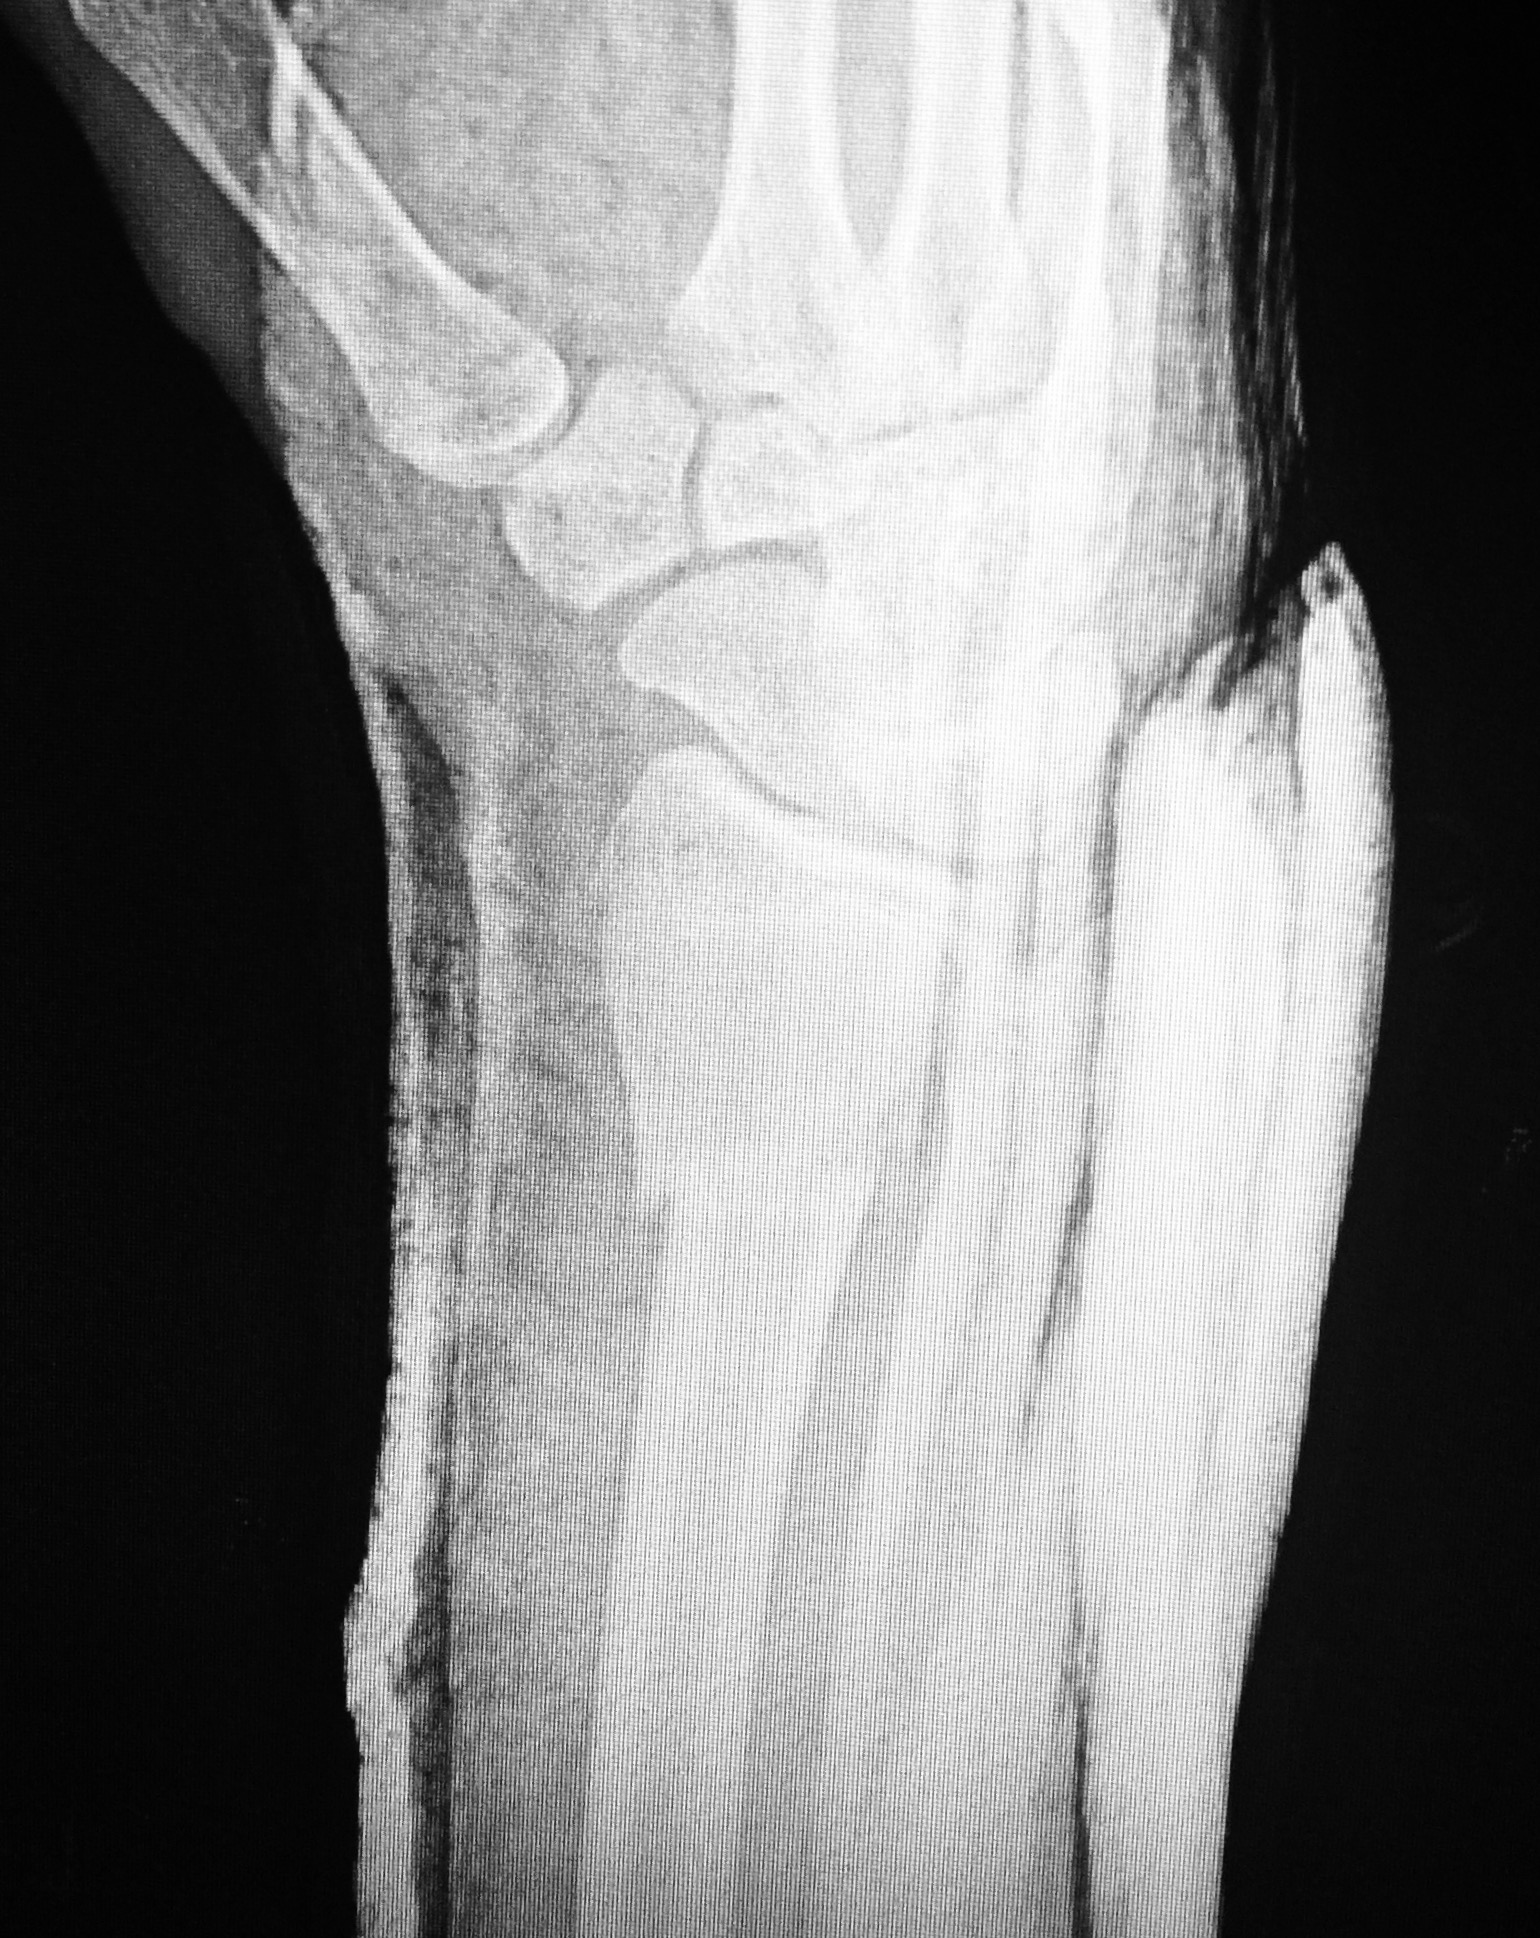
Example cases:
All had essentially painless completion of needed procedures
A 62-year-old female needed I&D of a large deltoid abscess after injection drug use.